Showing posts with label Home. Show all posts

Sunday, June 14, 2020

A Beginners Perspective on Canning

One of the best problems to have in gardening is what to do with all the delicious food you grow. You can gobble it up, share it with friends, or try to preserve it in some way. One of the most popular and traditional ways to preserve food is through canning. Now, there has been tons of stuff written on this subject by people far more experienced than me. I'll post some helpful links below. However, I wanted to share my observations with you folks who are considering getting into it before you take the dive.

First, it's not easy. Any experienced canner will tell you how easy it is to encourage you to give it a try. They mean well. They really do. But I'm going to give it to you strait - it's complicated, hot, and time consuming. If you mess it up, the cans won't seal properly, the food can get damaged, it can give you lethal botulism or you can even have jars explode. (They do use pressure cookers to make bombs). Be prepared for a steep learning curve. Do lots of research ahead of time.

Second, you will need lots of special equipment. I lucked out in this department because my mother - a long time canning expert - got wind that I was considering trying it for myself and I got all the stuff I need as a Christmas present. Thanks Mom! However, you will absolutely need a caner with rack insert and lid, lots of jars with no cracks or chips, a jar holder thingy to carry super hot jars (what is that called anyways?) a funnel and lids and rings. It's not cheap.

At this point, I want to say the best thing you can do is find someone who already does it and get some experience helping them. If you enjoy that, odds are you'll enjoy it on your own. It will also give you the best education possible.

Third, despite all the possible failures, so far (knock on wood) I've not had a single jar not set and the food has been good. My mother has been canning forever and no one has ever gotten sick from anything she's made nor has she experienced any explosions. So the odds on you experiencing those problems are slim if you follow instructions carefully.

So, why do I get into canning? It's kind of like getting a good work out. I don't necessarily enjoy it while it's going on but the sense of accomplishment afterwards is pretty awesome. Also, I enjoy history and tradition and canning food I grow makes me feel connected to my grandparents. Finally, I'm still stubborn enough that I feel the need to prove that I can do anything my mother can do.(Seriously, that's why I make pie crust from scratch, I'm just being stubborn. At least my family is getting some yummy food from it. Ha!)

Have you gotten into canning? Why or why not? I'd love to hear about it in the comments below.

Here are some helpful links:

https://www.freshpreserving.com/canning-guides

https://www.motherearthnews.com/real-food/canning/home-canning
.

Friday, November 17, 2017

Toddler Proof Christmas Decorating Part 2

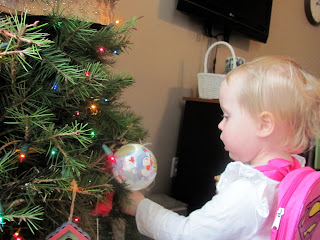
Last week I wrote about how to enjoy beautiful Christmas decorating even if you have young children in the house. This week, I want to focus in on the ultimate Christmas decoration - the tree. We've all heard of or experienced a pet or child related Christmas tree disaster. While I can't make any guarantees, I will share what's worked well for us.


First, a smaller tree might help if you have a younger toddler. In our old home, we had a really small living room so we would buy a fresh, four foot tree and tie it to the top of a side table. We then put a small skirt over the stand and the rope and it looked lovely and was, for the most part, out of our daughter's reach.

If you love a full size tree, as I do, then you can tie it to the wall in the back to help prevent the tree from being pulled over. While the tree is up, you can't see it at all. When the tree is done, there is just a very small nail that no one ever notices.

Second, many writers suggest that if you have pets or children, then you should buy a tree with soft needles (assuming you're buying fresh, if you like artificial trees then this won't apply). However, I see things differently. It's a pain to decorate but if you use a fresh tree with very prickly needles - like a spruce tree - will act as a deterrent to the smaller inhabitants of your home. 

Third, everyone knows to put the fragile ornaments at the top of your tree out of the kids reach. Be sure to affix them firmly so if the tree is shaken for any reason the ornaments stay put. Also, be sure to have plenty of unbreakable ornaments around the bottom of the tree to keep your kids distracted from the ones higher up.

Finally, keep a sense of humor and remember that this is your kids home too. Even as perfectionist as I can be, last year I was fine with my daughter pulling ornaments off and playing with them. As long as she left the lights alone, we were fine with her "messing it up".

I know some people put gates or fences around their tree to keep the kids away but I never liked that idea. It takes up too much space, it looks bad and it sends the message to the kids that Christmas is hands off. However, every home is different and you've gotta do what works for you.

Also, I should mention that safety is crucial. Be sure to use relatively new lights that have less or no heat and won't start a fire. Keep all open flames well away from your tree.

How do you keep your Christmas tree beautiful? Be sure to post your tips in the comments below.

Sunday, November 12, 2017

Toddler Proof Christmas Decorating Part 1

I realize this post is a departure from my normal subject matter but my garden is all but done for the year and this topic is very pertinent right now. Before becoming a stay at home mom, I actually got paid to decorate private homes and businesses for Christmas and I miss it, but having a two year old has brought new challenges. If you too, would like a festive home but have little ones (or pets, come to think of it) then this post is for you!

First, and I hate to state the obvious, consider scaling back on decorations in general. I'm a flaming hypocrite for saying it but think of it this way: you may love that wooden nativity set (and yes, it's not fragile) but do you want to pick it up off the floor six times a day? Me neither.


Second, embrace soft textiles. The stores are full of festive throw blankets and decorative pillows. You kids can't break them and they'll also keep you warm and comfortable - win, win! Just keep the grape juice and sharpies out of the family room....


Third, floating shelves are your friends. If you do want to display figurines, candles and vases that are breakable, then clear off your floating shelves and re-decorate them for Christmas. You can get your regular stuff back out in January. Floating shelves can make your house look festive and beautiful without your heirlooms getting broken.


Fourth, have a designated mess zone. I've actually heard moms say they dread making cookies with their kids because of the mess. How sad, because crafts and baking projects are the stuff that priceless memories are made of! So, designate a place in your house, for me it's my dining area, where the kids are allowed to make a mess. Ideally, there won't be carpet or anything else you don't want getting dirty.

Finally, be careful with poinsettia's and decorative berries like Holly and pepper berry. None of them are good for your pets or kids. They're beautiful but I'm not having them in my home until my kids are old enough that I don't have to worry about them eating them.

So, those are my best tips. How do you decorate with kids in mind? Stay tuned for next week when I share my tips for your Christmas tree.

Wednesday, May 10, 2017

Cheap Ways To Attract Birds To Your Yard

In writing this post, I'm supposing that everyone already knows the benefits to having birds in your yard - they eat bugs, they're indicative of a healthy eco system and they're just so fun to watch. You don't need to be convinced to attract birds but you may wonder how to do it without breaking the bank. Recently, I stopped by a specialty store just on bird watching but it was so incredibly expensive that I didn't buy anything. Apparently, lots of rich people enjoy birds too. However, if you are not one of them, then this post is for you.

Feeding

Gold finches on cone flowers.
The first thing people think about to attract birds is to put a feeder out. However, you can spend lots of money on a feeder and then spend tons of money keeping it full. It may surprise you to know that I only have two small feeders in my yard with no intention of putting up more. A small suet cake feeder can cost you only a few bucks and I don't spend more than $1 per refill. Despite it's size, I've seen large and small woodpeckers on it as well as chickadee's, titmice, nuthatches and many more birds. The other feeder I have is a small humming bird feeder that cost only a few dollars and the refills I can make myself.

You can, of course, make your own bird feeder out of anything from a milk carton to wood, to whatever strikes your fancy. You can also grow your own bird food. Sunflowers grow readily from seed and perennials like thistle and cone flowers attract many birds with their seeds.

Water

Unless you are lucky to already have a water feature of some kind in your yard, then adding a bird bath is a great way to attract more birds. My big advice here is to wait for sales or clearance items. Don't buy anything cheap that will blow away in the next storm. I recently found a great bird bath for only $23 on clearance. Of course, it's a one time purchase that can attract birds for years to come. You'll want to put it out someplace near your hose to make is easy to keep filled.

Housing

Bird houses come in all shapes and sizes but a simple, sturdy bird house doesn't have to cost more than $10 and will last for years if you clean it out during the winter. Bird's don't need anything cutesy, just the right size and shape. Perhaps that's a great post for the future...

Plants

By far, the biggest thing you can do is install bird friendly plants. Almost any plant can provide great nesting spots, protection from predators and shelter from storms. Keep in mind that evergreens will provide cover for birds all year round. Some plants, like holly's and other bushes with berries will also provide food. What I love about these plants is that you buy them once and they live for a long time. If you focus on buying native plants, then you will increase the likelihood that they will succeed in your yard.

Avoid Pesticide

Ok, so this picture wasn't taken in our yard. Ha!
Any kind of pesticide or harsh chemicals put on your yard or garden will drive away any kind of wildlife. Your efforts to create an organic, natural environment will result in birds feeling comfortable in your yard.

So, that is my whole approach to attracting birds. Have you had success or failure in your attempts to watch birds at home? Feel free to post about it in the comments below.


Wednesday, April 26, 2017

An Update on Projects from Around the Homstead

Spring has brought on a lot of little projects here and has certainly spiffed up what were some real eye sores around the yard. Everyone loves some before and after pictures so here are a few for you. Keep in mind, with me projects are never completely done, they just improve slowly over time.

Our mailbox was such a problem. A rotted, hollow post falling into the street. We gave it a much better replacement.

Before

After

The front flower beds where an erroding mess of weeds when we first moved in. That spot has taken some serious work but it's getting better all the time. You can find more info on how to build the retaining wall here. 
Before

After

Finally, this past weekend I FINALLY got my perennial herb garden installed. Mostly. Still looking for a few plants but I got a lot of good ones including English thyme, rosemary, sage, and oregano. In the after picture you'll notice it looks a bit empty but these perennial plants will grow to fill in the space. It's important to not crowd your plants. Decorative rocks can visually fill the space till the plants do so. You can learn more about growing herbs here.

Before

After
 So there's an update from our yard. What projects have you been up to? Feel free to post in the comments below.

Wednesday, March 29, 2017

Gardening In March

Today was so busy in the garden that I decided to take a break from the series I'm writing on pest control to share several ways you can enjoy your garden in March. Of course, I live in Pennsylvania so you may be ahead of us (if you live in the south) or you might have to wait a few more weeks (for those of you in the north). In any case, you don't have to wait till Mother's Day to play in the garden. Here are several things you can do now.

1. Prepare your soil for planting. This is me and my daughter raking out the soil in her raised bed. It's too early to plant her flowers yet we we're just getting it ready.


2. Clean out your perennial flower and herb beds. You can rake out all the dead plant material from last year and get  a head start on weeding.
3. Divide perennials and share with a friend. When plants like lilies and hostas are a few inches tall, it's a great time to divide them to thin them out. I dug some out of my bed to share with my neighbor.

4. Rake off some of the mulch off of the garlic. If you're lucky enough to have a garlic bed, now is a good time to thin off the mulch. I like to leave some on though to help retain moisture and keep down weeds.

5. Plant cold hardy flowers. Now is a fine time to plant a few specialty flowers like Helebore and Pansies that don't mind the cold. 

6. Any time of year is a great time to start composting but today was the day my wonderful husband made me this awesome bin. (it's on it's side in the picture). Seriously, everyone should get into composting. 
7. Enjoy the spring flowers that you planted last fall. 


8. Plant Spring veggies and put up rabbit fencing to keep animals out. You can read my post on spring vegetables Here. Erecting a fence is a great way to keep rabbits from mowing down your lettuce. 


Well, that's what I've been up to. Feel free to post about how you spend March in the garden at your house in the comments below. 


Wednesday, March 8, 2017

The Pennsylvania Garden Show of York: A Review

By the end of February, most of us are pining for some sign of Spring. Consequently, the timing for the Pennsylvania Garden Show of York is fabulous as it occurs the first weekend of March. If it's a break from winter that you're looking for, then the garden show will not disappoint. Flowers and landscaping displays are everywhere and the over all ambiance is lovely. A very large room full of garden - themed vendors is my idea of shopping. Here are some of my favorite things from the show.

> We have really enjoyed the live music provided by Seasons Music. The musicians were very talented and friendly: even obliging my 2 year old daughter with a rendition of "The Wheels On The Bus".  www.seasonsmusic.com


>The landscape displays are lovely. It's very relaxing to meander through them and if you do have any questions about improving your own landscaping, the vendors are very willing to talk.

> The vendor room is fantastic. Flower arrangements take up an entire end of the room. The other tables are taken up by nurseries, home improvement companies, garden shops, local environmental groups and many artisans.

> Several area wineries have tasting tables set up. Need I say more?

> A large swing set takes up a corner and provides a place for young children to play.

If you go, I will say that you should definitely buy tickets online ahead of time as there is always a line to purchase them at the door and you'll get  a discounted rate that way. Also, the food available is nothing to get excited about. We always plan to go out for dinner afterward.


My interest in gardening has always been more about growing my own food then having pretty landscaping so it's not my ideal. (It's certainly nothing compared to the Mother Earth News Fair in the fall). However, given the time of year and the inexpensive tickets, I plan on going to the Pennsylvania Garden Show of York every year in the future. For more information, go to www.pagsy.com.

Wednesday, November 30, 2016

How to Create the Perfect Evergreen Decorations Part 2

The first Christmas in a new home means figuring out how to do decorations. It can be very easy to get into a decorating rut: the tree always goes in the same corner, the nativity is placed on the same table and so forth. So this year feels like a clean slate for me, which is fun. On the other hand, I didn't want to go crazy and set the bar too high for future years. Here is what I came up with:

The window boxes where a gift from my father in law who is great at building things from wood. They were installed last month so this is the first thing I've ever put in them. Seriously, if you're going to do window boxes, you've gotta put some evergreen in them. It's not just for Christmas either, you can keep greens and pine cones out all winter and it looks great.

First, fill in with evergreens, keeping in mind the height and width you want. I didn't want to block the view out the window so I kept it short. You'll definitely want to use at least two different kinds of evergreen - typically a short needled fir and a long needled pine. I also added holly. The greens should completely cover the dirt underneath.


Second, add any ribbon, berries, sticks or pine cones that you have on hand. I've been loving burlap which will look great all winter. Pretty, huh?


Making your own wreaths is a bit hard core. It really takes time to wire that all together. If you're a purist like me and are determined to make your own, then you really need to check out a few youtube videos on how to do it. It's not that complicated but you've gotta see video to really get it. Alternatively, you could always buy the $8 wreath at Walmart and then decorate it yourself. The one I did here is a mixture of douglas fir, white pine and holly. I then added burlap ribbon, pine cones and artificial berries. I love real berries but with a toddler, I don't feel it's safe.


Pinterest gave me an idea for a porch light swag which was a snap to make. If you've never worked with evergreen before, swags are the place to start. You can do it!


Finally, you got to have a real tree. We had a blast discovering a local tree farm (just 5 minutes away!) and cutting our own tree (ok, Brian did all of that). My daughter is almost two and loved putting ornaments on. I'd love to hear about your evergreen projects and family traditions in the comments below!

Monday, November 21, 2016

How To Create The Perfect Evergreen Decorations Part 1

 Even after years of retail work, and seeing all of the materialism and consumerism it can entail, I still love the holidays. Singing carols, giving gifts, baking and so much more make December just fabulous. Every year, I also just love decorating, especially with fresh evergreens. The pictures in this post are from our old home last year.

1. Pine Roping is a favorite for me. It's classic, beautiful and very affordable. If you're made of money, you can go with cedar roping but I think the pine looks great and costs much less.


2. Containers can be so beautiful filled with a mix of fresh evergreens, red berries, and pine cones. Most gardeners have containers lying around unused in the winter. Put them to good use!


3. Who can resist a beautiful wreath? It's not hard to make your own with a wire frame and a good mix of greens, pine cones and a pretty bow. Check out youtube for some great how to videos on making your own wreath.


4. Of course, you've gotta have  a great, fresh tree. Our old house was so small, we could only get a small tree. I think it was really cute with pretty ribbon, lights and a very eclectic mix of ornaments that really represent our family. I can't wait to get a large, full size tree for our new living room!


5. When you think about decorating with fresh evergreens, maybe the first thing you think of is a beautiful centerpiece. I'm not going to lie, these are difficult to make yourself. As someone who not only has made hundreds of them, but has tried to teach others how to make them, I know. However, you can find them at any local florist and some grocery stores.


That's a look back at last year. After I get the new place decorated, I'll be sure to post pictures of that as well. Hopefully, this post will get you excited and inspired to make your own home beautiful and festive this holiday season.

Sunday, November 13, 2016

Struggling With Minimalism


In a previous post, I wrote about three principles for affording a country lifestyle. Even as I wrote it, I knew their was a fourth principle I wasn't including because it made me feel like a hypocrite - minimalism. Our society is constantly bombarding us with advertisements and consumerism. We all struggle with wanting more than we can afford.

You can't really afford country living if you're too busy buying everything HGTV, Cosmopolitan Magazine, and your friends say you need, to save up for a down payment on a house. You can't enjoy a house in the country if you're working 80 hours a week to afford it. For the majority of Americans, homestead living is only possible when you embrace minimalism: only buy what you really need, de-clutter your life, and don't be wasteful.

So, why couldn't I just include this in my last post? Because we struggle with it. When I was single, I had no problem pairing stuff down. Saint Francis was my hero. Now I have a fantastic husband who is very sentimental and holds on to lots of things we don't need because they remind him of something or someone. No matter what any one tells you, you can't really adapt a new philosophy to a home if your spouse isn't on board. We're also licensed foster parents so I hoard baby clothes like Hershey bars at a weight watchers convention. Minimalism feels so far out of reach.

Why am I writing this? Partly to finish my last post. I also figure there are a lot of people out there who also love the idea of minimalism but just haven't made it happen yet. What about you? What are some things that keep you from simplifying your stuff? Don't be hard on yourselves, I won't be.


Tuesday, November 8, 2016

Three Principles For Frugal Homesteading

Simple, country living holds a lot of appeal. Who doesn't want peace and quiet, open space, and simplicity? However, if you're watching HGTV, it might seem that buying a home in the country and getting established is going to cost a pretty penny. Don't be discouraged! In many ways, living in the country is cheaper than the city: no HOA's, lower cost of living, fewer taxes, etc. If you're already enjoying the good life (in the country) or just thinking about it, here are three principles you need to embrace to afford the life style you want.

Patience: When it comes to gardening, I always say you can be patient or you can be rich. For instance, when I bought a few bushes recently, I could get the small size for $9 each or the next size up which were $45 each. Guess what? We're going to have to be patient while waiting for the bushes to grow. Seeds are cheaper than plants. Fruit trees take time to grow and bear fruit. We're not rich, so we have to be patient. Frankly, my favorite gardens are the ones built and developed over time anyways, not the squeaky clean ones that got installed professionally in a weeks time. Embrace patience.

Community: I touched on this in a recent post. Wealthy people can afford to hire professionals to do their work. They can also buy anything new when they want it. Not so much with us. We needed help moving and painting. Friends and family and lent us tools, shared plants with us and gave us materials they had but didn't need. When needed, we're happy to help them out in return. In time, I look forward to dividing perennials with others and being able to share from our homestead. In order to afford a rural lifestyle, you really need to be part of a community.

DIY: We can't always just afford to go buy what we want or need so we've embraced a spirit of Do It Yourself. If we can build it, paint it or create it ourselves, then we do. It is so much cheaper. Aside from the savings, it also gives our home more meaning and uniqueness. If you don't have a particular skill, then maybe you can get someone to help you in exchange for helping them out. My mother in law has made beautiful curtains for our home which is great since sewing isn't my thing (yet). In return, I've helped her out in the garden. Learning how to do things yourself is a huge part of homesteading.

What are some philosophies or principles you embrace to enjoy living in the country? I'd love to hear about it in the comments section below.

Friday, November 4, 2016

How To Make A Strong Retaining Wall

My last house had a serious erosion problem along side the carport but I figured installing a retaining wall would require a professional and a lot of money. When we moved to the new house, the soil was eroding from underneath the front stoop and something had to be done. After the cost of moving, we couldn't afford much so I did some research, got some freebies, and got to work.


You can find many videos on Youtube on how to install a simple, small retaining wall. It's actually amazing how simple it is. Special, retaining wall bricks are available in different colors and sizes at any garden center for little cost. Look for the bricks with the "lip" that will hang over the side of the brick beneath it. I'm even cheaper than that. When visiting my in laws, I discovered that they had a lot of retaining wall bricks laying around from a project they had torn up and no longer needed. Free bricks for me.

As an aside, one of the beautiful things about gardening is how warm and generous gardeners can be. We share tools, plants, time, and other resources as best we can. I don't mind taking hand outs from others because I'm always willing to reciprocate. If you're serious about gardening on a budget, then you need to be part of community.

Getting back to retaining walls, it's very important that your bricks are level, especially front to back. You must also stagger the bricks. We actually have a neighbor who stacked his bricks in strait stacks and his retaining wall is falling over. The first level takes time to get right but the other levels will be much easier. That is it. Seriously, that's it. I didn't spend a cent on this retaining wall. Now, if you needed a larger, stronger retaining wall then maybe it's time to call a professional but for this size project, you can definitely handle it.


You can tell from the picture that the garden bed is far from finished. I didn't want to pile up too much loose dirt at once to have it wash away. I bought a dwarf Alberta Spruce because I know from my last home that their roots will help prevent further erosion. A friend of mine has a few flower beds completely over grown with red coral bells so she had no problem with me taking a few.  The purple bugle weed came with the house. Come Spring, this bed will be beautiful with more plants, more soil and mulch. Stay tuned!

Monday, October 17, 2016

A New House, A New Beginning

You can't really appreciate change unless you know what something was to begin with. A person who is 20 pounds overweight might look heavy to you unless you knew they used to be 100 pounds over weight. As much as I love HGTV, it often gives the impression that renovations take place over a few months and then you get a perfect home. Most of us, myself included, can't afford to hire professionals to renovate our entire home and build the garage I'd love to have. So in the meanwhile, my husband and I, with help, will grow our gardens, DIY skills and our family.


We almost didn't even look at this house because I hate the lack of curb appeal. It looks like a box stuck on a hill, doesn't it? However, when there in person, we realized it has tons of potential and had all of our essentials. The quarter acre yard was smaller than I wanted but it's all very usable.


Part of the lack of appeal was the lack of staging and cleaning done by the previous owners. Many of the paint colors where unattractive and the stickers left on the wall wouldn't appeal to anyone. Wait till you see what we've already done to the dining area. 


The yard is large but was almost completely empty. They left one small swing set (which is great for our daughter) a decent size shed, one Sargent cherry tree, and one small flower bed. We've already created three new garden beds and have planted several bushes, but I've got tons of plans for turning it into a little homestead. 

What's the most important thing we're going to be doing here? Raising our kids. We have a beautiful little girl and we plan to start taking in foster babies soon with the hopes of being able to permanently add to our family eventually. Hence the name, Growing Lillys. This is what we've started with. Future posts will show how we fixed up the house, developed the yard and learn new DIY skills, all on a very tight budget. Stay tuned!