Showing posts with label yard. Show all posts

Thursday, March 14, 2019

PA Garden Show of York 2019

In general, I'm a pretty positive person when it comes to anything about gardening. However, this was my third visit to the PA Garden Show of York and it might be my last. Nothing was terrible mind you, the people are nice and we didn't have any problems. It was just, well, the same thing every year.

While my husband perused the large assortment of wineries (a definite plus) I got to meander around with my four year old daughter and it just didn't take long at all to see all the displays. Honestly, if you've been to any of these indoor garden shows then you've seen everything that was there. The same old, same old varieties of tulips, daffodils, hyacinths and hellebore. No one is really putting any thought into plant selection and the displays are showcasing the same outdoor sheds and fountains that I've seen so many times before.


On the other hand, one display was a fun, over the top tiki hut display and I also enjoyed the old country house display. There's also something to be said for any blooming plants in the first week of March. My daughter also had a great time and enjoyed the kids activity table put on by the Penn State Extension office. She was bummed that they didn't have the play set display that had been there in years past.

Speaking of the Penn State Extension Office, there booth was by far the most interesting to me and I really enjoyed talking with one of the volunteers about the Master Gardener Program. They had some great information on native plants, but I really could have skipped the grumpy old man at the "ask a gardener" table. (Apparently, you shouldn't ask THAT gardener anything).

Naturally, they had a large room full of garden themed vendors. I appreciated the plant selection there and made a few purchases. Honestly, I think the vendors are a bigger draw to me than the landscaping displays.

Will I go again? Maybe. Depends how desperate I feel next March for some Spring flowers. Should you go? If you feel desperate enough for flowers yourself. Or at least, you can get some great wine.


Sunday, February 18, 2018

Gardening in Late Winter/Early Spring

As I write this, there are a few inches of snow on the ground but in two days the temps are supposed to hit 70 degrees. Central Pennsylvania in late Winter I suppose. It's on those random, unusually warm days that you really want to get out of the house and do something but it's way too early to be planting a garden. (Here, near Harrisburg, PA, I don't plant anything till St. Patrick's Day, if you want to know.) However, that doesn't mean there's nothing to do outside! Here are some great ways to make use of a warm February afternoon.

1> Pick Up Trash. I know, I know, it's not fun but it needs to be done. Winter winds will blow around trash and it will land in your yard. March can be an ugly time of year, not because of the mud, but because of all the garbage lying around that the melting snow revealed. So go pick it up. In your own yard at least.

2> Turn Your Compost Pile. You can be adding kitchen scraps and other compost to your bin all winter so when the pile thaws out, give it a good mixing to encourage it along. What? You don't have a compost bin? Get one (or build one)! Composting is a no-brainer way to turn garbage into useful garden soil.


3>Clean our your bird houses. It's nice to leave them up during the winter to provide shelter for birds but now is a great time to clean them out to start fresh this Spring. No need to scrub, just empty them out.

4>Rake up any leaves you left from last fall. In fact, if you can, shred them with your mower and then put them on your compost pile, or you can use them as mulch in some of your garden beds. 

5>While your at it, give your lawn mower any annual maintenance it requires so it's ready to go when the grass is long.

6> Start preparing any garden beds for Spring planting. My vegetable garden was well manured and mulched last fall so I'm not worried about it now. However, I have a shipment of plants coming this week so I've been getting the beds ready for them. (Digging up sod, fertilizing, laying down cardboard and mulching over that if you want to know.)

7>Cleaning out your garden shed. Yeah, I'm a hypocrite about this right now as you can barely get in ours but hey, you can organize your garden shed!

8>Hurry up and do any pruning you haven't gotten to yet. It's best to prune most trees and bushes  while they're still dormant. Once you see fresh buds coming out, it's really too late. However, many different shrubs have unique pruning needs so be sure to look up guidelines for your specific plant.

So, there are my suggestions for how to best utilize warm, late winter days. What do you do when the snow melts? Feel free to post in the comments below.


Monday, October 2, 2017

Review of the Dirt Doctor

Have you ever accidentally happened upon information that you needed at just the right time? A few weeks ago I had a blast at the Mother Earth News Fair in Seven Springs, PA. One workshop I almost missed out on was "Tree Maintenance and Care" with Howard Garrett.  I almost didn't go (end of the day) but our only mature tree had been showing signs of distress and I was also planting several other trees and didn't really know what I was doing. This class really helped.

Please note, I don't get paid any thing from Mr. Garrett or his company nor did I get special permission to write about his methods. This is just my review of the class as well as how I've applied the information to my yard. Also, Mr. Garrett is also known as the "Dirt Doctor" and you can learn a lot from his website: www.dirtdoctor.com. 

Mr Garrett's main theory is that it is very difficult to plant a tree too shallow but it is very easy to plant a tree too deep. He says trees need to show a "flare", that is, you should see the root system starting to branch out away from the trunk. Trees should not look like telephone polls coming out of the ground he says. So, if you have a tree in need of help, here are his three steps.

1. Dig away from the tree till you can see the root flare. You may see some superfluous roots spiraling around the trunk and they should be removed. 
2. Aerate the soil and sprinkle soil amendments over it. He mentioned a few but the only one I remember is Corn Meal. I remembered that one because it was the cheapest. 
3. Make Garrett Juice and spray on the foliage. He generously gives out the recipe so you can make your own. It's an organic plant food. 

So, on my ornamental cherry, I dug out several inches of mulch and soil to expose several roots. I had to remove spiraling roots and then placed decorative rocks to fill in a bit of the hole created without touching them to the trunk or putting them over the roots. I could have made the Garrett Juice but it was so much cheaper to order the concentrate online so that's what I did. I sprayed it on many of the leaves and also created a ground soak to pour around the trunk. I've bought corn meal but haven't used it yet. I won't really know how well it works till next spring though.

How about you? Have you tried Mr. Garrett's advice? What advice do you have for tree care?

Wednesday, May 24, 2017

Make The Most Of Your Grass Clippings

If you've been following this blog, then you know I love a bargain and there isn't any better bargain than free and readily available. If you have  a lawn, then you have an abundance of grass clippings. For heavens sake, don't just throw them away - you can put them to good use around the garden.

First, be sure to leave some on the lawn as decomposing grass clippings will put nutrients back in the soil which will keep your lawn looking better. At least once a month, don't bag your clippings but let them lie on the lawn. Maybe it's not as manicured that way but your lawn will be healthier for it.

Second, put them in your compost bin. What? You don't have a compost bin? You need to have a compost bin. American's in general throw away tons of food every year and then we gardeners go and buy bagged compost to put on our gardens. It just doesn't make any sense. If you have your own compost bin, it will cut way down on your garbage and will provide free compost for your gardens. Just be sure to keep out any animal by-products so your compost pile won't stink.

Third, use it as mulch in your vegetable gardens. Mulch like straw and wood chips is too heavy to use around fragile seedlings but grass clippings are a great way to retain moisture in the soil, keep weeds down and provide nutrients to the new plants. Win-win-win.

Finally, if you're getting into lasagna gardening, and you should at least consider it, grass clippings make a great free layer of bio mass to include. It's really a no brainer.

What do you do with your grass clippings? I've heard they also make a great feed for chickens and rabbits. Feel free to post your ideas in the comments below.

Wednesday, May 10, 2017

Cheap Ways To Attract Birds To Your Yard

In writing this post, I'm supposing that everyone already knows the benefits to having birds in your yard - they eat bugs, they're indicative of a healthy eco system and they're just so fun to watch. You don't need to be convinced to attract birds but you may wonder how to do it without breaking the bank. Recently, I stopped by a specialty store just on bird watching but it was so incredibly expensive that I didn't buy anything. Apparently, lots of rich people enjoy birds too. However, if you are not one of them, then this post is for you.

Feeding

Gold finches on cone flowers.
The first thing people think about to attract birds is to put a feeder out. However, you can spend lots of money on a feeder and then spend tons of money keeping it full. It may surprise you to know that I only have two small feeders in my yard with no intention of putting up more. A small suet cake feeder can cost you only a few bucks and I don't spend more than $1 per refill. Despite it's size, I've seen large and small woodpeckers on it as well as chickadee's, titmice, nuthatches and many more birds. The other feeder I have is a small humming bird feeder that cost only a few dollars and the refills I can make myself.

You can, of course, make your own bird feeder out of anything from a milk carton to wood, to whatever strikes your fancy. You can also grow your own bird food. Sunflowers grow readily from seed and perennials like thistle and cone flowers attract many birds with their seeds.

Water

Unless you are lucky to already have a water feature of some kind in your yard, then adding a bird bath is a great way to attract more birds. My big advice here is to wait for sales or clearance items. Don't buy anything cheap that will blow away in the next storm. I recently found a great bird bath for only $23 on clearance. Of course, it's a one time purchase that can attract birds for years to come. You'll want to put it out someplace near your hose to make is easy to keep filled.

Housing

Bird houses come in all shapes and sizes but a simple, sturdy bird house doesn't have to cost more than $10 and will last for years if you clean it out during the winter. Bird's don't need anything cutesy, just the right size and shape. Perhaps that's a great post for the future...

Plants

By far, the biggest thing you can do is install bird friendly plants. Almost any plant can provide great nesting spots, protection from predators and shelter from storms. Keep in mind that evergreens will provide cover for birds all year round. Some plants, like holly's and other bushes with berries will also provide food. What I love about these plants is that you buy them once and they live for a long time. If you focus on buying native plants, then you will increase the likelihood that they will succeed in your yard.

Avoid Pesticide

Ok, so this picture wasn't taken in our yard. Ha!
Any kind of pesticide or harsh chemicals put on your yard or garden will drive away any kind of wildlife. Your efforts to create an organic, natural environment will result in birds feeling comfortable in your yard.

So, that is my whole approach to attracting birds. Have you had success or failure in your attempts to watch birds at home? Feel free to post about it in the comments below.


Wednesday, April 26, 2017

An Update on Projects from Around the Homstead

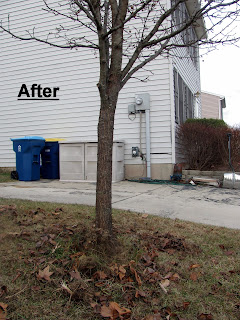
Spring has brought on a lot of little projects here and has certainly spiffed up what were some real eye sores around the yard. Everyone loves some before and after pictures so here are a few for you. Keep in mind, with me projects are never completely done, they just improve slowly over time.

Our mailbox was such a problem. A rotted, hollow post falling into the street. We gave it a much better replacement.

Before

After

The front flower beds where an erroding mess of weeds when we first moved in. That spot has taken some serious work but it's getting better all the time. You can find more info on how to build the retaining wall here. 
Before

After

Finally, this past weekend I FINALLY got my perennial herb garden installed. Mostly. Still looking for a few plants but I got a lot of good ones including English thyme, rosemary, sage, and oregano. In the after picture you'll notice it looks a bit empty but these perennial plants will grow to fill in the space. It's important to not crowd your plants. Decorative rocks can visually fill the space till the plants do so. You can learn more about growing herbs here.

Before

After
 So there's an update from our yard. What projects have you been up to? Feel free to post in the comments below.

Thursday, April 20, 2017

Keep Mosquitoes and Ticks Out of Your Yard

After writing about pests for three weeks, I decided to keep on topic by writing about mosquitoes and ticks. Who does not hate mosquitoes and ticks? They can absolutely ruin your garden time and make cook outs miserable. If you're like me, then spraying a bunch of pesticide everywhere and bathing in DEET doesn't sound desirable. Before you grab the chemicals, try a few natural methods to reduce their presence in your yard from the get go. I'm not getting into personal bug spray here as that's not my area of expertise but rather going over ways to keep them out of your yard.

Mosquitoes

First, and most importantly, get rid of all standing water in your property. Mosquitoes don't need a lot of water, small puddles in discarded tires or old buckets are plenty big for laying eggs. Be sure you're not providing good reproduction habitat by getting rid of standing water.

Second, encourage the mosquitoes natural predators. If you have the space, and it's not against your zoning laws, you may want to install a bat box to encourage bats to your property. Bats eat lots of bugs. If that creeps you out, you can install a purple martin box as they too will be happy to eat your mosquitoes for you. If you really want to keep the pond on your property, then put in some Koi fish to eat the mosquito larvae. Dragon flies also eat mosquitoes but I have no idea how you'd attract them to your yard.

Third, try planting mosquito repelling plants around your patio and back yard. I've not tried this myself but many people swear by it. Plants that are most often recommended to repel mosquitoes include: marigolds, lavender, rosemary, basil, garlic, catnip, and geraniums. Actually, is kinda sounds like you just plant an herb garden which I highly recommend anyways. You can read more about growing herbs here.

Fourth, for special occasions, I don't mind burning a citronella candle  or the tiki torches. I wouldn't bother with them all the time for the hassle and expense but for a party of some sort, it could be a great idea.

Ticks

Oh, how I hate ticks. A hundred itchy mosquito bites are nothing compared to the vile grossness of finding a tick half buried in your skin. One of those nasty things got me last November and the memory of it still sets off my gag reflex, and even that is nothing compared to the awful diseases they carry. Here in PA, we are in prime Lyme's disease territory. Having had a few friends battle the disease has made a strong impression on me so keeping ticks away is a big priority.

If you have the option, chickens LOVE to eat ticks and are great and keeping them out. I've been told three wandering hens can clear an acre of ticks.

If chickens are not an option, then be sure to eliminate their habitat in your yard. Don't leave piles of old leaves lying around or let your grass get too long. I have no value for a perfectly manicured lawn but a shorter cut one won't attract as many ticks. Leaf piles are the worst.

Small rodents carry ticks so anything you do to keep them off your property will also keep the ticks away.

Ticks, apparently, don't like to walk on wood chips or gravel so if your property is connected to a woody area, try putting in a three foot buffer of either material to keep them out.

Wood piles can really attract ticks (and rodents) so if you have any on your property, keep them neatly stacked in a full sun area.

Finally, according to Rodale's Organic Life magazine, beauty berry bushes have been shown to repel ticks. Even if they don't, they're really pretty so why not plant a few?

So, there's my best advice on preventing bug bites in your yard. Do you have any natural prevention's you like to use? Feel free to comment in the area below.


Wednesday, March 29, 2017

Gardening In March

Today was so busy in the garden that I decided to take a break from the series I'm writing on pest control to share several ways you can enjoy your garden in March. Of course, I live in Pennsylvania so you may be ahead of us (if you live in the south) or you might have to wait a few more weeks (for those of you in the north). In any case, you don't have to wait till Mother's Day to play in the garden. Here are several things you can do now.

1. Prepare your soil for planting. This is me and my daughter raking out the soil in her raised bed. It's too early to plant her flowers yet we we're just getting it ready.


2. Clean out your perennial flower and herb beds. You can rake out all the dead plant material from last year and get  a head start on weeding.
3. Divide perennials and share with a friend. When plants like lilies and hostas are a few inches tall, it's a great time to divide them to thin them out. I dug some out of my bed to share with my neighbor.

4. Rake off some of the mulch off of the garlic. If you're lucky enough to have a garlic bed, now is a good time to thin off the mulch. I like to leave some on though to help retain moisture and keep down weeds.

5. Plant cold hardy flowers. Now is a fine time to plant a few specialty flowers like Helebore and Pansies that don't mind the cold. 

6. Any time of year is a great time to start composting but today was the day my wonderful husband made me this awesome bin. (it's on it's side in the picture). Seriously, everyone should get into composting. 
7. Enjoy the spring flowers that you planted last fall. 


8. Plant Spring veggies and put up rabbit fencing to keep animals out. You can read my post on spring vegetables Here. Erecting a fence is a great way to keep rabbits from mowing down your lettuce. 


Well, that's what I've been up to. Feel free to post about how you spend March in the garden at your house in the comments below. 


Thursday, March 2, 2017

Planting Fruit Trees: The Basics

You've ordered your fruit trees (if not, you'll want to get on that soon) and are waiting for them to arrive. Or, you're planning on going to a local nursery soon to buy some. If you're getting a bare root plant, and you should, then here is how to plant them when they arrive.

First, what you should have on hand ahead of time: A round pointed shovel, five gallon bucket, half a bag of composted manure per tree, half a bag of bark mulch per tree, and tree guards. All of these items are available at your local garden center although they looked at me pretty funny when I stopped by for manure in January. Oh, well.

Any decent company will include planting instructions with the trees but just in case (or as a suplement) here is how I planted my trees last week.

1. As soon as the trees arrive, remove all packaging and put them in a 5 gallon pail to soak roots for 4-6 hours. Be sure to plant them ASAP, as in, same day if at all possible.


2. I had plotted out my location for the trees ahead of time so while they were soaking, I dug the hole: removing all the grass in a 2 foot radius from where I wanted the tree. I then dug down deep enough to more than allow for the size of the root ball. (you can take a tree out of the water for a few minutes to use it to measure).


3. If any or the roots were damaged in transit, you can prune off the damage with hand pruners. Otherwise, just plant your tree. Pack the dirt in somewhat firmly around the roots and stop about 2/3rds of the way up to add water and help the soil settle around the roots. Also, be sure to not bury the graft line. All fruit trees are grafted unto rootstock and you do not want to bury where they are joined. It's pretty obvious when you get the plant.

4. You do not need to amend the soil around the tree in any way, In fact, it's better for the tree if it is allowed to adjust to the native soil as soon as possible. However, in order to provide some extra nutrients, I spread out half a bag of composted manure (available cheaply at any garden center) over the hole I dug. As it rains, the nutrients will seep down to the roots. Because I highly object to weeding, I also spread wood bark mulch over that.

5. When that's done, be sure to put a tree guard around the base of the tree to protect it (you'll have to remove it after a year or two so it doesn't choke the tree) and give the tree a thorough watering to get it started.


That's it! You're on your way to home grown fruit in a few years. Be sure to keep in watered during dry spells those first few years. Pruning is also important but that's for another post. I highly recommend "Grow A Little Fruit Tree" by Ann Ralph for more information. What kind of fruit trees are you growing?

Wednesday, January 4, 2017

Necessary Pruning for Beginners Part 1

If you own a yard with a tree in it, then you need to read this post. Pruning can be intimidating but you don't need a special class to do some basic cuts that will improve the health and appearance of your tree. That being said, if you have large trees (over 20 feet tall for our purposes) that need limb removal, please hire professionals. People get hurt all the time from climbing up into trees with chainsaws. 

For those of you with fruit trees, ornamental trees, or trees that are still young, you may have noticed "suckers" -small branches growing from the base of your tree. These branches are not desirable for either the appearance or health of the tree and should be removed. You can do this any time but winter is the traditional time for pruning in northern climates as the tree is dormant.

Start with clean, sharp pruners and cut as close as possible to the trunk of the tree so you don't leave stubs. You don't need to use any kind of sealant as the tree can heal by itself. I recommend you check over all your trees once a year because the larger the suckers get, the larger the scab will be on the tree. You don't want your ornamental trees to resemble the very neglected crab apple in the picture.


Also, if there are other small branches growing from the trunk below the scaffold (the place where the first main branches separate from the trunk) you can also remove them while you're at it.


Don't be nervous! You can totally do this and it will be great for your trees. For more information, particularly on fruit trees, I recommend "Grow A Little Fruit Tree" by Ann Ralph.